
Individual E‑Invoices for Patients
This article explains how to generate and manage individual invoices for patients who specifically request an E‑Invoice.
Steps to Provide an Individual E‑Invoice
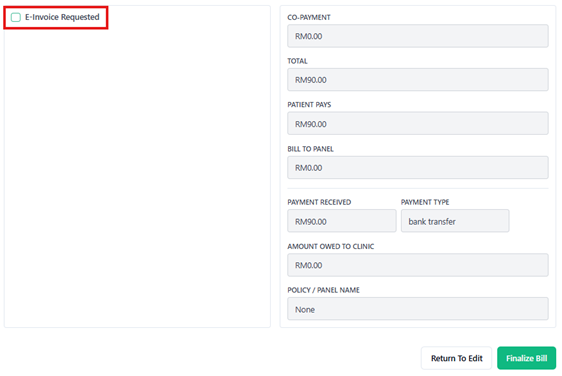
- Finalize the bill
- Tick E‑Invoice Requested when closing the bill.
- Fill in the required patient information.
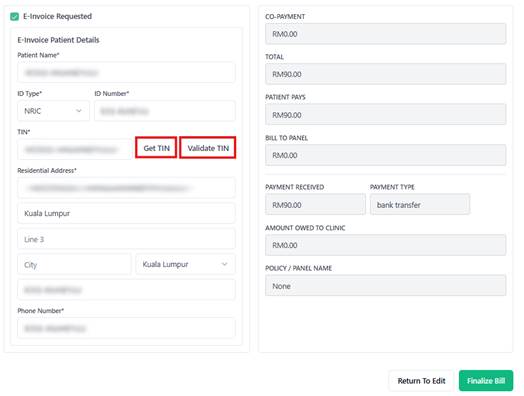
- If the patient is unsure of their TIN, use Get TIN and Validate TIN before finalizing.
- Tick E‑Invoice Requested when closing the bill.
- Automatic submission
- Once finalized, the invoice is automatically submitted to the MyInvois portal.
- The patient record will appear under Accounts > E‑Invoicing > Individual Invoice.
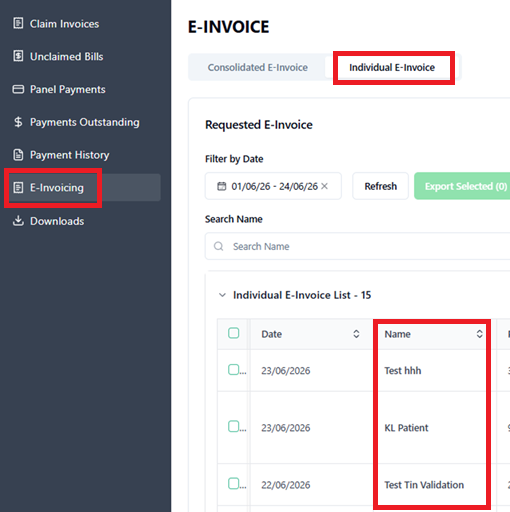
- Review submission status
- Each invoice will display both Submission Status and Validation Status.
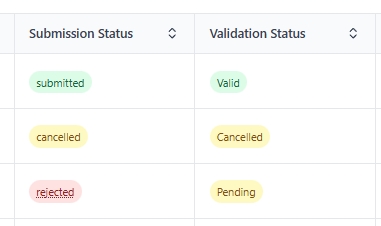
- Rejected invoices: Hover over the “Rejected” status to view the reason provided by MyInvois. Make the necessary corrections and re‑submit.
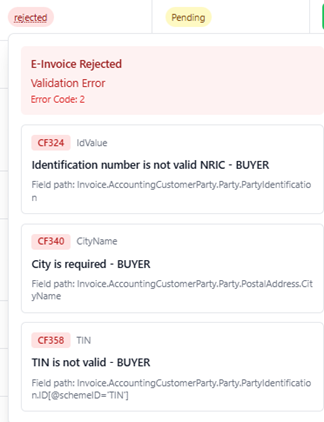
- Successful invoices: Status will show Submitted and Valid.

- Cancelled invoices: If submitted accidentally, click Cancel Submitted. The status will update to Cancelled.

- Click View to see detailed invoice information.
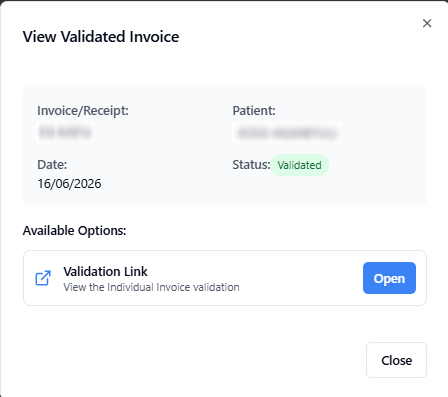
- A direct Validation Link to the MyInvois portal is available; click Open for further details.
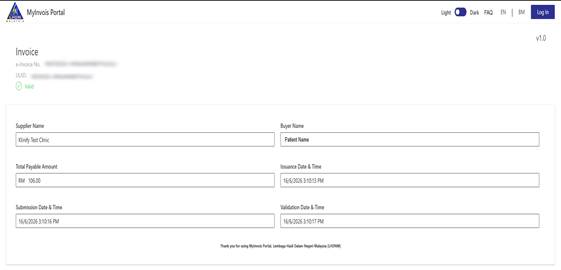
- Each invoice will display both Submission Status and Validation Status.
- Re‑submission
- Cancelled or rejected invoices can be re‑submitted by ticking the preferred bills.
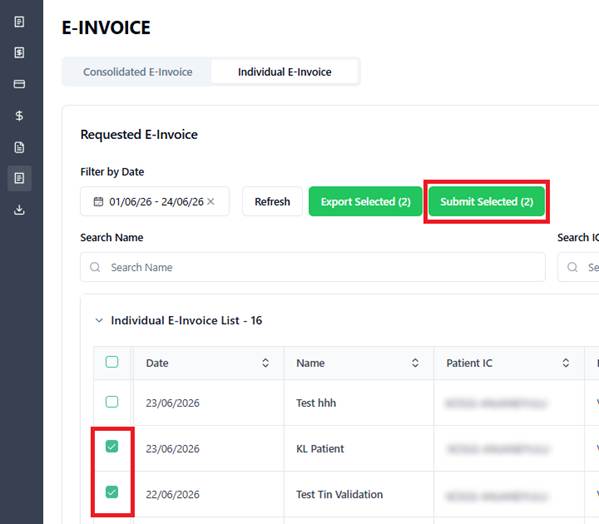
- Cancelled or rejected invoices can be re‑submitted by ticking the preferred bills.
- Manual submission (optional)
- Clinics may also submit invoices manually. For instructions, see: [Manual Guide].
If you need further assistance, feel free to contact Klinify Chat Support via the  icon.
icon.
Jika anda memerlukan bantuan, sila hubungi Klinify Chat Supportmelalui ikon .
.